
It’s been a long time / I shouldn’t have left you / without a strong blog to post to.
As promised, the 3rd part in my ongoing “Building a Cheap, Energy-Efficient HTPC & Classic Gaming Emulator Box” series of articles on my Acer Revo 1600.
I’d like to outline in this article my settings for playing back perfect 1080p HD movies on the Acer Revo in Windows 7. There’s a lot of incomplete information out there regarding how to “properly” playback HD movies on the Revo. Unfortunately, a lot of the stuff I have read online doesn’t take into account things like subtitle rendering which can have an impact on movie playback. So I wanted to write a definitive guide for the Revo which I have spent months honing and perfecting.
What You’ll Need
My hardware setup:
Acer Revo 1600 (standard ION LE, upgraded to 2 gigs of RAM, with adjusted 512MB of video RAM as detailed here).
Alternatively, you could use a Revo 3600 or 3610. And possibly (??) similarly-spec’d ION platforms such as Asrock, etc. But your mileage may vary.
Software
Windows 7 (I am using Home Premium 32bit Upgrade version, non-OEM)
Windows Media Player Classic Home Cinema
CoreAVC 2 (~$10)
Haali Media Splitter
Directvobsub
Nvidia Graphics Drivers (I am using 257.21 WHQL)
Nvidia HDMI Audio Driver (I am using 1.00.00.59 WHQL)
Start Installin’
First, download and install the Nvidia Graphics Drivers:
If you are using an Revo 1600, select:
“ION > ION LE (Desktops) > Graphics Drivers > and then select your OS”
If you are using an Revo 3600 or 3610, select:
“ION > ION (Desktops) > Graphics Drivers > and then select your OS”
Follow the on-screen steps. Don’t install the Ethernet drivers if prompted (unless you specifically want them).
Continue to follow the on-screen instructions and reboot your Revo.
Next, download and install the Nvidia HDMI Audio drivers:
Revo 1600:
“ION > ION LE (Desktops) > HDMI Audio Drivers > and then select your OS”
Revo 3600 or 3610:
“ION > ION (Desktops) > Graphics Drivers > HDMI Audio Drivers > and then select your OS”
You may need to reboot.
After installation of the HDMI Audio driver, go to Control Panel > Sound > Manage audio devices.
Under the “Playback” tab, make sure “NVIDIA HDMI Out” is set to default with the green checkmark.

Download and install Media Player Classic Home Cinema and install using default options.
Next install CoreAVC 2.0. This handles the codec decoding and it is excellent at what it does. Yes, I know there are free options out there. But this is what I have used and I can guarantee it works on the Revo 1600. Install it with the default options.
Here is how CoreAVC’s options will appear using the default installation. Remember, do not change any of the options during installation:

Next, install Haali Media Splitter with default install options. This will parse your MKVs and other video files and designate which programs will open the separate streams of the file, including audio and video. Haali does all the work, don’t even sweat it.
Finally, install Directvobsub with default install options. Why Directvobsub? Because when I used MPC’s internal subtitle filters, large bit-rate files would suffer during playback. We need to offload the subtitles to another program to let MPC do its thing, and Directvobsub is great at that.
Ready, Settings, Go!
Everything installed with default options, then? Great, we’re almost there!
OK, I know it feels like we just blew through all of that. But here’s where we will set things up:
In Media Player Classic, go to View > Options > External filters.
Click “Add filter” and locate “DirectVobSub (auto-loading version)”. Highlight it and click, “OK”. Now click “Prefer”, hit “Apply” and then “OK”.

Next, go to “View > Options > Output”.
Select “EVR (Vista/.Net3)”. This is an extremely fast decoder, and it handles every single video file I throw at it like a champ.
Hit, “Apply” and then “OK” to save your selection.

Now You’re Playing with Power
At this point, you are ready to go!
Use Windows Media Player Classic Home Cinema to open up all of your HD movie files from here on out.
When you play an HD file, you will notice a few new icons pop-up on your taskbar:
![]()
From left to right they are:
CoreAVC: When the icon is green, CoreAVC has engaged the Revo’s GPU CUDA capabilities and is properly decoding the video.
Haali Media Spliter: The green arrow means Haali is working properly, and demultiplexing the movie’s streams.
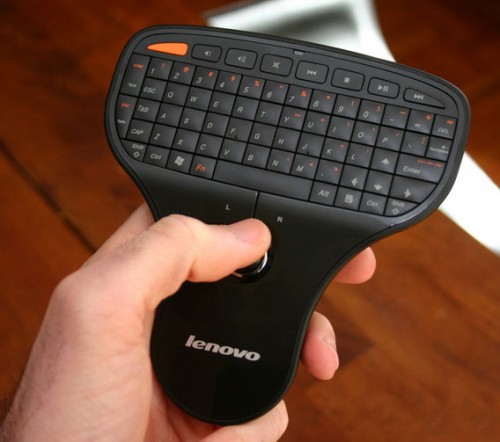
DirectVobSub: Right-click this white icon to bring up your audio and subtitle streams. In Media Player Classic, you can easily switch between subtitles by simply hitting “S” on the keypad while a movie is playing. This is super easy if you have a handy HTPC remote, such as my trusty Lenovo Wireless keyboard.
And honestly, that’s it. You can now play 1080p and 720p HD movies flawlessly on your Acer Revo.
Bonus Tips & Tweaks
Here’s a few more tips I have setup to make an enjoyable movie watching experience using Media Player Classic Home Cincema:
In Media Player Classic, click “View > Options > Player”. Here, place a check next to, “Launch files in fullscreen” so that movies start in (you guessed it) fullscreen mode immediately after clicked.

Another nerdy thing I do is turn on the statistics options, simply so I can marvel frome time to time at how zero frames are ever dropped with this particular setup. To do this, open Media Player Classic and select “View” from the menu. Place a check next to: Caption&Menu, Seek Bar, Controls, Information, Statistics and Status. You will end up with a statistics panel that plays below the movie, which will only display when you escape from fullscreen mode:

And there you have it. This is what I use. I have scrutinized the playback of dozens of movies with various bitrates and file containers. This setup has proven rock solid for me. I hope it does the same for you.
Enjoy.
Update – August 2010: The Dharma Initiative
Thanks to Scott R in the comments as well as the AVS Forums for hipping me to the presently in-development (but extremely promising) Dharma builds of XBMC on Windows 7. These are essentially betas at the moment, but will one day become the latest release of XBMC.
What’s so special about the Dharma branch of nightly builds is its use of DXVA 2. This is the latest Direct-X video acceleration from Microsoft and it only works on Vista and Windows 7. I’ve thrown a ton of test videos at the Dharma XBMC install and it’s played everything without a hitch.
It’s all very promising, because now you get perfect HD video playback and the fantastic XBMC front-end to boot. The only shortcoming at the moment is: Since the XBMC crew is currently working on the Dharma branch, the code is constantly changing, features are slowly trickling in, and bugs will more than likely pop-up.
Of course, all those issues will be sorted out once Dharma is ready for prime time. I look forward to it.
Click here to download the latest Dharma nightlies. Please note: This software is in development and prone to bugs and may be lacking features. Also, if you currently have XBMC installed, you will need to completely uninstall it (along with profile data) before you install the nightly. Also, be sure to turn on DXVA 2 in the settings, as it was set to “off” by default in my nightly.
Scott R also hipped me to the fact that you can use an external video player with XBMC front-end. And you can do this NOW in 9.11 of XBMC. I tried it with Media Player Classic and it WORKS. You’ll need to edit an XML file with a simple notepad progam, but it’s not too difficult. I recommend testing it out! Cheers!
Continue reading:
Part 1 — Building a Cheap, Energy-Efficient HTPC & Classic Gaming Emulator Box
Part 2 — The Refinement: Building a Cheap HTPC & Gaming Box
8 comments for “Part 3 — Windows 7: Play 1080p HD MKV Movies on Your ION Acer Revo”